The past week I've spent countless hours on my computer. Because this is what I've been working on:
My new event-planning business! I'm so excited about it! Even though I have two business degrees, there's still a lot for me to learn 'on-the-job'. So I'm asking my followers (even those of you who anonymously follow!) please check out the website and follow 5-9 Events on facebook.
Much prayer and good vibes requested on this new endeavor!!!
P.S. I have to say thank you to my graphic designer, Desi Design, for my great new logo. Check out her great work here!
Showing posts with label party. Show all posts
6.24.2011
Y3W | My new baby!
6.18.2011
Eva's Birthday Party - part three
Soo, this is the last post recapping Eva's party. Visit part one to see the theme and decor, and part two for the food and desserts. This one is all about the activities and other pics from the party. Enjoy!
First up are some of the photos from our pre-party photoshoot. Eva refused to nap that day, so we had a mildly cranky baby on our hands. Mr. Binky was always within arms reach.
I love this picture of her!
She looks so innocent here, hahaha.
I had a few activities planned for the kids. When they first walked in, I had a coloring station setup for the kids to color and create a book for Eva. I got the idea here.
As you can see, there is sheet music fabric on the coloring station. I got this from the fabric scrap bins at Hobby Lobby for about a dollar - the same place I found the fabric backdrp for Eva's monthly photos.
Next we played a quick game of musical chairs. There were only 4 kids in attendance, two were too shy to play and our only boy was off playing somewhere else. Ah well. With kids, you have to be prepared to change plans. Plus, the party was only 2 hours so there wasn't a need to fill every minute with activities.
After we ate, I gave the kids a shot at the pinata. At this point it had started raining, so I was thankful I could just hold it and let them pull the strings, instead of the old-school 'beat-it-with-a-bat' technique.
Ahhh, candy!!!
Singing to the birthday girl!
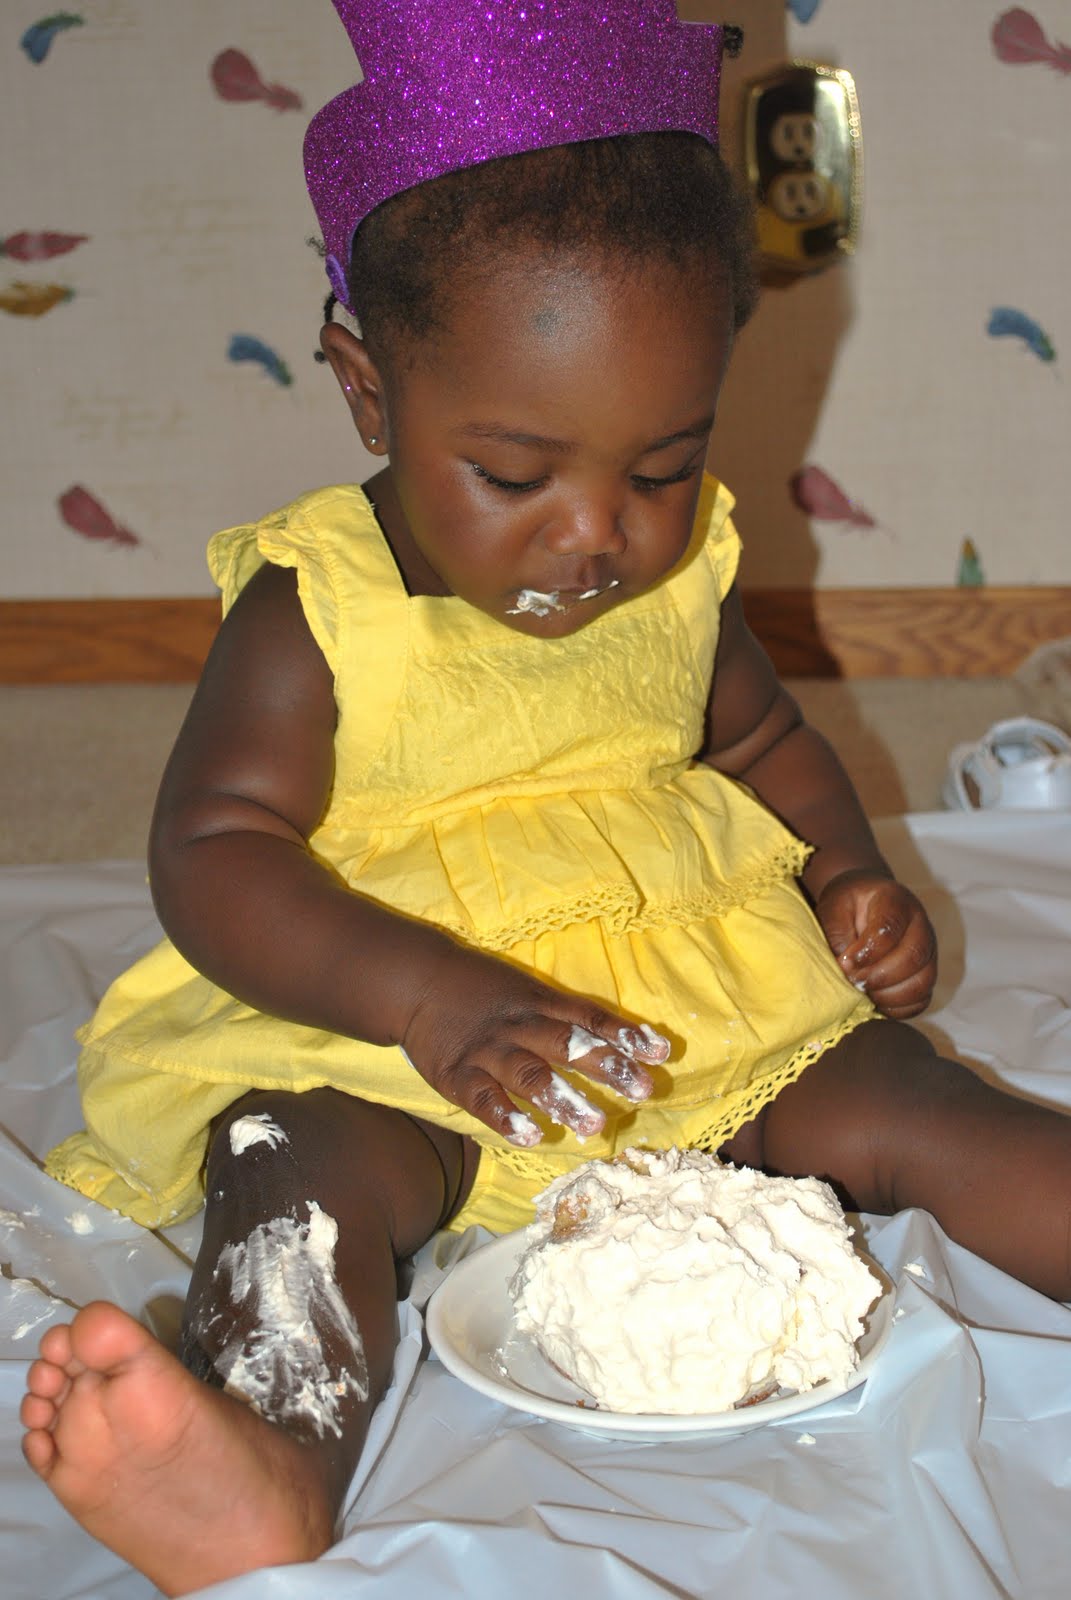
I'm not sure about this cake thing, mom
She loved playing in it. Eating it - not so much. And she had the same reaction on her actual birthday two days later.
The after-effects:
All of her presents! Very spoiled girl!
Playing outside
First up are some of the photos from our pre-party photoshoot. Eva refused to nap that day, so we had a mildly cranky baby on our hands. Mr. Binky was always within arms reach.
I love this picture of her!
She looks so innocent here, hahaha.
I had a few activities planned for the kids. When they first walked in, I had a coloring station setup for the kids to color and create a book for Eva. I got the idea here.
As you can see, there is sheet music fabric on the coloring station. I got this from the fabric scrap bins at Hobby Lobby for about a dollar - the same place I found the fabric backdrp for Eva's monthly photos.
Next we played a quick game of musical chairs. There were only 4 kids in attendance, two were too shy to play and our only boy was off playing somewhere else. Ah well. With kids, you have to be prepared to change plans. Plus, the party was only 2 hours so there wasn't a need to fill every minute with activities.
After we ate, I gave the kids a shot at the pinata. At this point it had started raining, so I was thankful I could just hold it and let them pull the strings, instead of the old-school 'beat-it-with-a-bat' technique.
Ahhh, candy!!!
Singing to the birthday girl!
I'm not sure about this cake thing, mom
She loved playing in it. Eating it - not so much. And she had the same reaction on her actual birthday two days later.
The after-effects:
All of her presents! Very spoiled girl!
Ready to dig in and open gifts...
Happy baby!
Playing outside
All in all it was a great day and fun was had by everyone. Now the only struggle is refraining from planning her 2nd birthday party ;)
6.16.2011
Sorry for the cliffhanger! Eva's Birthday Party - part two
So it's been over 2 weeks since I posted part one of Eva's party pics. My apologies! I definitely did not intend to have that big a gap between parts one and two. If you missed the first one, check it out here.
This post is all about the food and dessert tables. I purposely had the party in between lunch and dinner, so guests wouldn't expect a meal. I kept the food simple to cut down costs, minimize any 'day-of' prep and because after all, it was a party for a baby. I wanted the food to stay with the theme, so I named everything accordingly.
Here's a photo of the full food table:
I got a deli tray from the grocery store, and used two-toned bread to resemble a piano.
Here's another shot of the 'Keys to a great sandwich':
I got honeydew, canteloupe and watermelon from a local farmer's market. It was so stinking good. This picture makes my mouth water for more. Anyhoo, I used a melon baller to cut the fruit up and called it 'Whole Note fruit salad':
Chips and dip were simply 'cymbals':
And had to have Chicken 'Drumsticks' to round out the meal:
The food label cards that I used were courtesy of Hostess with the Mostess. I had intended to also use the patterned paper printable, but in the end it was cheaper (and easier) to use the scrapbook paper I found at Hobby Lobby. LOVE her website, it gave me lots of inspiration!
Here is the beverage station. I found the yellow straw holder and purple/white straws at Michael's in the dollar bin. A plus about selecting a theme and color scheme early means that you can buy random things you find ahead of time, instead of getting all the party supplies those last couple weeks prior.
I made custom labels by using the label setting in Word, and printing them out on sticker paper. There are actually waterproof bottle labels you can buy and print on your home computer, but they're not available in most stores. I looked them up online and it wasn't worth the cost or hassle to me. So I left the water room temperature - otherwise the condensation would have ruined the labels!
I had a recipe for this lemonade punch, but we were running a little behind before the party-goers arrived, so everything just got dumped in there - very unscientific! I do remember that it included powdered lemonade mix, pineapple juice, lemon-lime soda and water. It turned out pretty good!
On to the dessert table!
Another view:
I had actually made this candy dish while in Texas at a military spouse activity. I specifically chose this color because not only could I use it at the party, but it matched some of my home decor.
Eva's smash cake was simply yellow cake with buttercream frosting. I wasn't worried about the sugar content, because most babies hardly eat their smash cakes, and even if she did, it's only one day. Everything in moderation!
The 'stand' for her cake is actually a little basket with a ribbon handle. I found it at Target in the $1 bins! It matched her sparkly crown perfectly!
I made the cupcakes as well. If you look closely, you'll notice the cupcake wrappers matched the corresponding frosting color.
White chocolate-covered oreos, courtesy of Sweeties by Kim. I have to add that I won these through a contest on The White Library, but Kim still treated me like a regular paying customer - great service!
Chocolate cake pops - so good! I should add that I used one box of chocolate cake mix for the cupcakes and cake pops, and one box of yellow cake mix for the cupcakes and smash cake. I doubled my buttercream frosting recipe, but didn't need to. So doing these myself was very economical!
5.31.2011
Eva's Birthday Party - part one
Soooo, I finally got the pictures back from Eva's party a few weeks ago. I'm so glad that I had a friend take pictures for me, because that day was seriously a blur. I was so busy hosting and comforting a cranky child that I didn't reach for my camera once. I had a high school friend come and take pictures - she did a FABULOUS job! and to top it off, she didn't charge me a dime. Sometimes it truly is all about who you know.
This first post is dedicated to decor and theme. I'll follow up with post(s) on the food/dessert and activities. Below is the invite that I had designed by Jenni from 9 designs. You'll remember this post, where I was super excited about winning a free design from her!

I knew I had to incorporate 'Diva' in the party/invite. Eva has such a strong personality and can be quite demanding at times. Almost from birth, she earned the nickname Eva the Diva. She also loves music, so we went with a jazzy/Diva theme. Jenni did a great job with the invite, and I think it was a perfect way to introduce the feel of the party to guests prior to that day. To save money, I actually sent them out via email. I also didn't want to print them at home because I didn't think they'd turn out too great on an inkjet printer. But I was pleasantly surprised that they looked fine (I printed a couple for my grandmas and one for a keepsake) I'll keep that in mind for next time.
Here is one of the table centerpieces:

In this post, I discussed alternatives to traditional poms. I love the way it turned out! I found the vase at Goodwill, and beneath it is a piece of scrapbook paper.
Here's the other centerpiece, with round flowers, as opposed to the pointy ones in the above picture.

Here's a full view of the table setup:

I wanted black & white in the table settings, but damask or printed paper plates can be pricey. To get around that I purchased black dessert plates and white dinner plates. This way, the leftovers can be used for future events as well. For a touch of yellow, I set out yellow forks at each setting.
The other full table setting:

This was above the food table:

That was the other use for the 'pom alternative'. I got the letter 'E' at Michael's in the $1 bin section.
Here is the monthly photos displayed at the party:

The purple fabric was purchased at Hobby Lobby in the scrap bin for around $1! I plan on using it to redecorate Eva's room when we move into our new apartment.
The birthday banner!

I created the letters in word (super easy!) printed them and cut them out. I then used the leftover cupcake wrappers as spacers. They are all hung together using fishing line that was taped to the wall.
And lastly, the favor bags:

I created the tags in word, using the birthday banner letters as a template. I printed them off, cut them out and then used double-sided tape to attach them to the bags. The bags were purchased at a party store in Texas. I should have gotten a picture of the contents, but they were mini instruments: a maraca, harmonica and horn. The kids loved them!
Coming up...the food and dessert tables and party activities!
This first post is dedicated to decor and theme. I'll follow up with post(s) on the food/dessert and activities. Below is the invite that I had designed by Jenni from 9 designs. You'll remember this post, where I was super excited about winning a free design from her!

I knew I had to incorporate 'Diva' in the party/invite. Eva has such a strong personality and can be quite demanding at times. Almost from birth, she earned the nickname Eva the Diva. She also loves music, so we went with a jazzy/Diva theme. Jenni did a great job with the invite, and I think it was a perfect way to introduce the feel of the party to guests prior to that day. To save money, I actually sent them out via email. I also didn't want to print them at home because I didn't think they'd turn out too great on an inkjet printer. But I was pleasantly surprised that they looked fine (I printed a couple for my grandmas and one for a keepsake) I'll keep that in mind for next time.
Here is one of the table centerpieces:

In this post, I discussed alternatives to traditional poms. I love the way it turned out! I found the vase at Goodwill, and beneath it is a piece of scrapbook paper.
Here's the other centerpiece, with round flowers, as opposed to the pointy ones in the above picture.

Here's a full view of the table setup:

I wanted black & white in the table settings, but damask or printed paper plates can be pricey. To get around that I purchased black dessert plates and white dinner plates. This way, the leftovers can be used for future events as well. For a touch of yellow, I set out yellow forks at each setting.
The other full table setting:

This was above the food table:

That was the other use for the 'pom alternative'. I got the letter 'E' at Michael's in the $1 bin section.
Here is the monthly photos displayed at the party:

The purple fabric was purchased at Hobby Lobby in the scrap bin for around $1! I plan on using it to redecorate Eva's room when we move into our new apartment.
The birthday banner!

I created the letters in word (super easy!) printed them and cut them out. I then used the leftover cupcake wrappers as spacers. They are all hung together using fishing line that was taped to the wall.
And lastly, the favor bags:

I created the tags in word, using the birthday banner letters as a template. I printed them off, cut them out and then used double-sided tape to attach them to the bags. The bags were purchased at a party store in Texas. I should have gotten a picture of the contents, but they were mini instruments: a maraca, harmonica and horn. The kids loved them!
Coming up...the food and dessert tables and party activities!
Subscribe to:
Posts (Atom)